In This Article
- Why Robot Grease Problems Are a Bigger Deal Than They Look
- Common Robot Grease Failures and What Causes Them
- Step-by-Step Robot Grease Troubleshooting
- The Right Grease Keeps You Out of Trouble
- Don’t Skip These Maintenance Steps
- Spotting the Early Warning Signs of Robot Grease Issues
- When It’s Time to Call the Pros
- Trust Your Grease Needs to T.I.E. Industrial
- Frequently Asked Questions About Robot Grease
Industrial robots don’t tolerate poor maintenance. If the grease inside your system breaks down, leaks out, or gets contaminated, performance takes a hit—and not gradually. Joint noise, overheating, erratic movement, or flat-out failure usually follow. Robot grease problems aren’t rare, either. They show up even in well-maintained systems and usually surface when production can’t afford a delay.
This guide cuts straight to the point: what to look for, what to do, and when to bring in help. If your robot’s showing signs like abnormal movement, noise, or visible wear, robot grease issues are often the culprit. Let’s walk through how to spot and fix the usual suspects before they turn into expensive downtime.
Why Robot Grease Problems Are a Bigger Deal Than They Look
Robot grease seems like a small detail—until it isn’t. One missed service or the wrong product in the wrong joint, and suddenly your robot’s motion turns jerky, noisy, or flat-out unreliable. These are classic signs of common robot grease problems, and they’re usually the first clue that something deeper’s off.
These aren’t rare occurrences. Even systems that follow regular robot maintenance schedules can run into grease trouble if the environment’s dirty, the duty cycle’s aggressive, or someone skipped a step in re-lubrication.
If your robot parts start behaving differently—louder, slower, hotter—don’t wait. Most common robot grease problems show up before failure hits. Spotting them early can save thousands in repairs and prevent days of unplanned downtime.
Common Robot Grease Failures and What Causes Them
Most grease failures aren’t random. They’re the result of bad habits, missed steps, or the wrong materials. Once the grease goes, the damage doesn’t take long to show up. Understanding the cause of common robot grease failures is the first step to staying ahead of them. Here are the most frequent culprits.
Wrong Grease for the Job
Not all grease is interchangeable. Using something too thick, too light, or incompatible with your robot’s specs leads to poor lubrication and faster breakdown. Some formulas can even react with seals or trap heat inside gearboxes. One wrong choice of grease can undo years of solid performance.
Skipped or Delayed Maintenance
This one’s simple. Skip a service interval, and you risk letting the grease degrade past the point of doing its job. Most common robot grease issues start showing up when maintenance gets pushed back “just a few weeks.” That’s when joints start dragging, seals begin to leak, and internal wear speeds up.
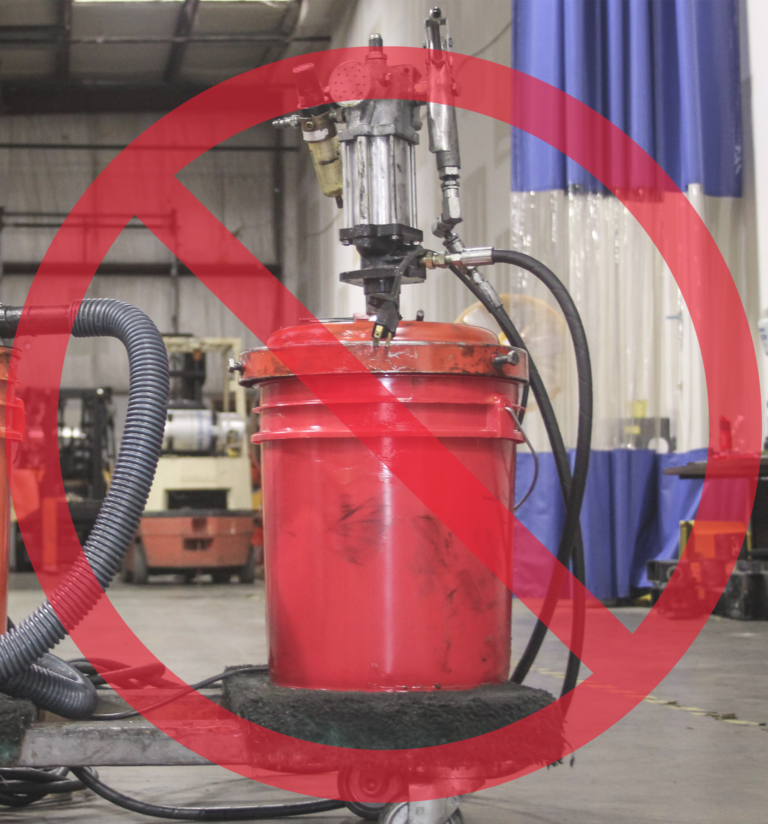
Overgreasing and Undergreasing
Too little grease, and you get metal-on-metal contact. Too much, and pressure builds up inside the gearbox, blowing past seals and forcing contaminants in. Both problems cause early wear and erratic movement. Overgreasing is especially common after manual re-lubes are done without purge fittings or proper volume control.
Environmental Contamination
If the robot runs in a dirty, wet, or high-temp environment, grease takes a beating. Coolant spray, metal chips, or fine dust can get into joints and degrade the grease fast. Once it’s contaminated, lubrication fails, and the joint starts chewing itself up from the inside.
Heat Cycling and Age
Even the right grease breaks down over time. Heat cycling, especially in systems that run continuously, causes grease to thin out, oxidize, or lose its lubricating properties. Once the consistency changes, it stops protecting the moving parts, and robot grease problems start stacking up fast.
Knowing these failure points means you don’t have to guess what’s wrong when performance dips. In most cases, the signs point straight back to one of these root causes. Catch them early, fix the issue, and avoid dealing with a blown reducer or trashed motor down the line.
Step-by-Step Robot Grease Troubleshooting
Robot grease troubleshooting doesn’t require guesswork—just the right process. If your robot’s acting up and grease is the likely culprit, don’t jump straight to flushing or part replacement. Follow these steps to isolate the problem and decide what action makes sense.
Step 1: Power Down and Lock Out
Start with safety. Shut down the robot, isolate the power, and follow proper lockout/tagout procedures. You’re dealing with high-torque components—don’t take shortcuts here.
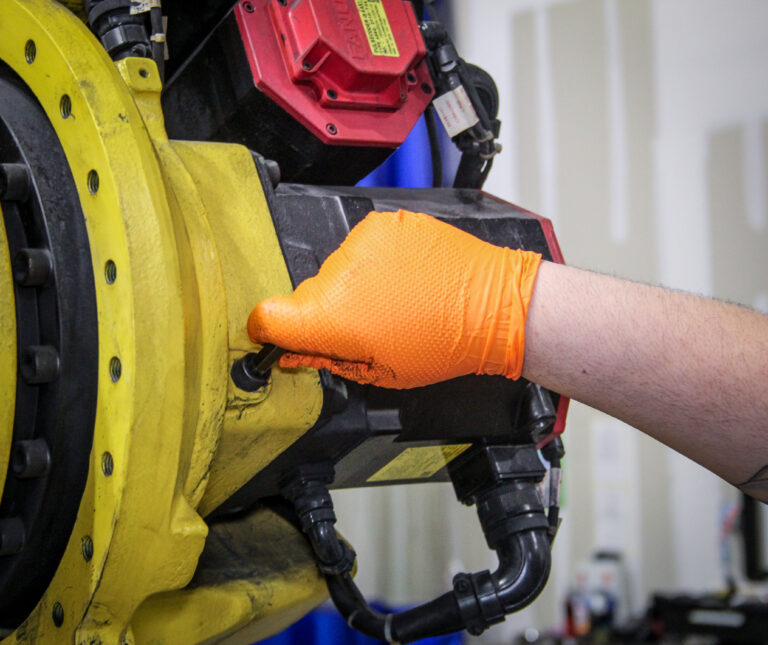
Step 2: Inspect Key Points Visually
Before touching a fitting, take a good look. Check for:
- Grease leaks around joints or seals
- Hardened grease build-up near fittings
- Dust or grime sticking to old purge spots
- Signs of under- or overgreasing (bulging seals, dry spots, etc.)
This tells you where to focus and whether the issue is isolated or system-wide.
Step 3: Check Motion Behavior
Move the robot manually (if your model allows) and feel for stiffness, drag, or resistance in the affected axes. If it’s jerky, uneven, or tight, you’re likely dealing with either dry points or contaminated grease. No movement at all? That’s beyond lubrication. Stop here and check for mechanical failure.
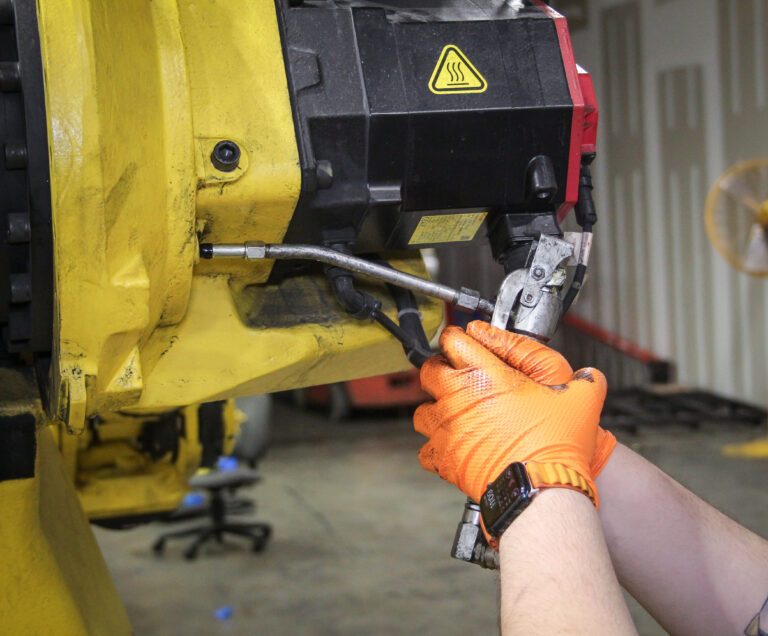
Step 4: Take a Grease Sample
Extract a small amount of grease from the joint. Check:
- Color: Is it darker than it should be?
- Consistency: Does it feel gritty, dry, or watery?
- Smell: A burnt smell usually means excessive heat exposure.
This gives you a quick read on condition without pulling the joint apart.
Step 5: Clean, Reapply, or Flush
Based on what you’ve seen:
- If the grease is dirty or dried out — Flush and replace.
- If it’s clean but low — Reapply to spec volume.
- If it’s overfilled or pushing past seals — Remove excess, clean purge paths, monitor pressure.
Stick to the robot’s OEM recommendations for volume and grease type. Don’t eyeball it.
Step 6: Test and Monitor
Once you’ve cleaned and re-lubed, put the robot through a test cycle. Listen for improvements in sound and feel. Log the work, note the service date, and schedule a follow-up check. If things don’t improve or if they get worse, it’s time to escalate.
Most robot grease problems can be corrected before they cause hardware failure. But only if you spot them early, troubleshoot the right way, and act fast.
The Right Grease Keeps You Out of Trouble
Grease isn’t something to cut corners on. Using the wrong product or waiting too long to replace it can put a robot down fast. T.I.E. Industrial stocks the lubricants your system needs, matched to model specs and ready to ship without the wait.
- Backed by real techs who know what works and what doesn’t
- Compatible with numerous robot models
- Ships fast to avoid production delays
Don’t Skip These Maintenance Steps
You don’t need to overhaul a robot every month to keep it running smoothly. But skipping key maintenance steps opens the door to all kinds of robot grease problems. Most grease failures can be traced back to a missed service, a sloppy re-lube, or using the wrong product entirely. Follow these tips to ensure a smooth operation:
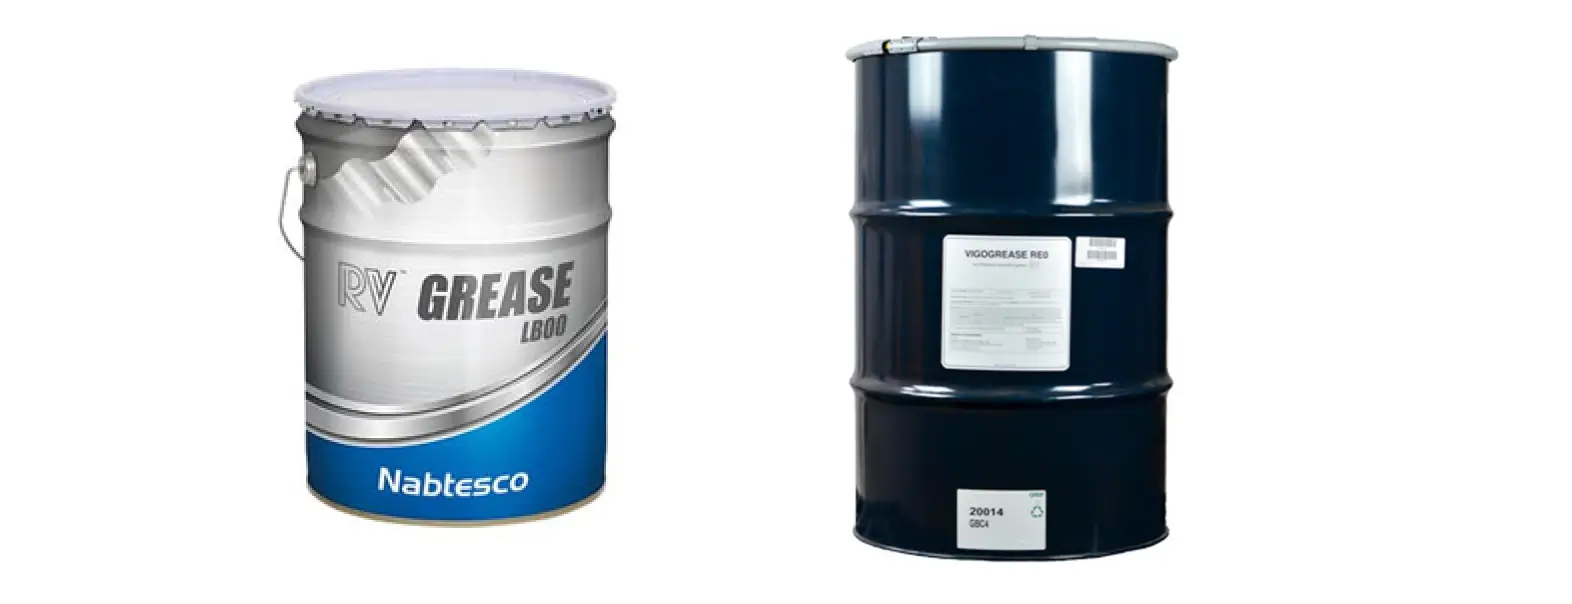
Use the Right Grease—Every Time
Robot grease isn’t universal. Each model requires a specific formula with exact viscosity and thermal tolerances. Using an off-brand or substitute might seem fine short-term, but it breaks down faster, causes seal swelling, and clogs up purge paths. Stick with the grease formula that the manufacturer recommends, and make sure it’s the real thing.
Follow a Set Schedule
Guesswork doesn’t cut it in robot maintenance. Skipping a re-grease because “it still looks OK” is a fast track to early joint wear. Set a real schedule based on run hours, duty cycle, and environment. Then follow it.
Don’t Contaminate the System
Even good grease turns useless if you pump dirt in with it. Wipe fittings before connecting. Use clean tools. Keep lube containers sealed when not in use. One tiny bit of grit can score a bearing or clog a lube channel.
Purge Properly
When re-lubing, don’t just pump in fresh grease and walk away. Purge old material out of the drain point until clean grease comes through. Otherwise, you’re just mixing old and new and trapping sludge inside the joint.
Log Every Service
Track what you used, when you used it, and how much. This helps spot trends or identify if someone used the wrong product last time. A simple log can save hours of diagnostics later.
Regular attention to grease keeps robot performance stable, extends component life, and avoids the ugly surprise of a failed joint in the middle of a shift. Stay on top of the basics, and most common robot grease issues won’t get the chance to show up.
Spotting the Early Warning Signs of Robot Grease Issues
Catching grease-related problems early can be the difference between a simple re-lube and a full teardown. Common robot grease issues often start small, but ignoring them usually leads to bigger failures. Look for these signs:
Movement That Feels Off
A well-lubricated robot moves with consistency. If a joint starts sticking, hesitating, or drifting during a move, don’t blame the program first. Grease contamination, breakdown, or a dry spot in the gearbox can all throw off motion accuracy. These aren’t just quirks. They’re warnings.
Sounds You Shouldn’t Hear
Grinding, whining, or ticking sounds usually point to friction where there shouldn’t be any. New or louder noises, especially when the robot’s under load, often track back to robot grease failures. If motion gets louder over time, grease breakdown or contamination is probably the root.
Heat Where It Doesn’t Belong
Joints or motors running hotter than usual can mean the grease isn’t doing its job. Heat breaks grease down faster, which creates more friction, which creates more heat. It’s a loop that ends in failure if you don’t catch it early.
Visual Red Flags
A simple walk-around can reveal a lot. Keep an eye out for:
- Grease leaking around joint seals or gearboxes
- Dust or debris sticking to wet spots
- Hardened or discolored grease near fittings
- Excess grease pushed out around purge ports
- Grit or metal flakes in exposed grease
These are all signs of robot grease issues you shouldn’t ignore. Leaks and contamination can spread quickly, pulling dust and chips into places they don’t belong.
Delayed Robot Maintenance
If you’re behind on your last service interval or if the robot’s been running nonstop, it’s time to inspect. Skipping or delaying scheduled robot maintenance is one of the fastest ways to invite grease failures.
When these symptoms show up, don’t guess. Get the robot offline, inspect the affected joints, and decide fast: clean, re-grease, or call in a pro. Each delay tightens the window between a fixable issue and full component damage.
When It’s Time to Call the Pros
Some grease issues go deeper than a top-off and wipe-down. If your robot’s still showing signs of trouble after a clean re-lube—or if you’re chasing the same problem repeatedly—it’s time to bring in specialists who deal with robot grease failures every day.
Know When to Escalate
Don’t wait until a joint seizes or a motor throws a fault mid-cycle. If you’ve got:
- Repeated grease contamination
- Major leaks that keep coming back
- Visible damage around seals or fittings
- Gearbox noise that worsens after service
- Heat or drag that doesn’t go away after re-lubing
… it’s no longer a DIY fix. You’re likely dealing with internal wear or deeper mechanical issues that need teardown, flushing, or precision parts replacement. Call a professional in to diagnose and address the issue.
Trust Your Grease Needs to T.I.E. Industrial
Don’t patch a failing joint with second-rate grease or the wrong spec. T.I.E. Industrial has the right product, ready to ship fast. Order today and take advantage of everything we offer.
Frequently Asked Questions About Robot Grease
The $5.8 billion global grease market can be challenging to navigate, but T.I.E. Industrial has the guidance you need. Here are some common questions people ask.
When should I clean versus completely replace the robot grease?
If the grease still has decent color and texture and you’re not seeing major contamination, leaks, or motion problems, you can usually just purge and top off with fresh product. But if the grease is dark or gritty, smells burnt, or has metal flakes in it, don’t mess around. Flush the system completely and re-lubricate to spec. Partial cleanouts only work when the existing grease hasn’t broken down or been compromised. When in doubt, flush it out.
Can old or contaminated grease cause robot failure?
Yes. That’s how most robot grease failures start. Old grease loses its ability to lubricate and cool. Contaminated grease grinds down internal parts or clogs up channels. Either one leads to increased friction, overheating, seal damage, and eventually component failure. Common robot grease issues like these don’t stay small for long. If you spot signs of trouble, act before the repair gets expensive.
How can I prevent grease-related issues in the future?
Stick to the basics and stay consistent:
- Use the right robot grease.
- Follow a tight robot maintenance schedule based on hours, not guesses.
- Keep tools clean and fittings free of debris during service.
- Fully purge old grease instead of mixing new with bad.
- Log every service so small issues don’t sneak up on you.
Most grease-related problems are avoidable. Stay ahead of them, and your robots will keep moving like they should.
Was this helpful?
0 / 0